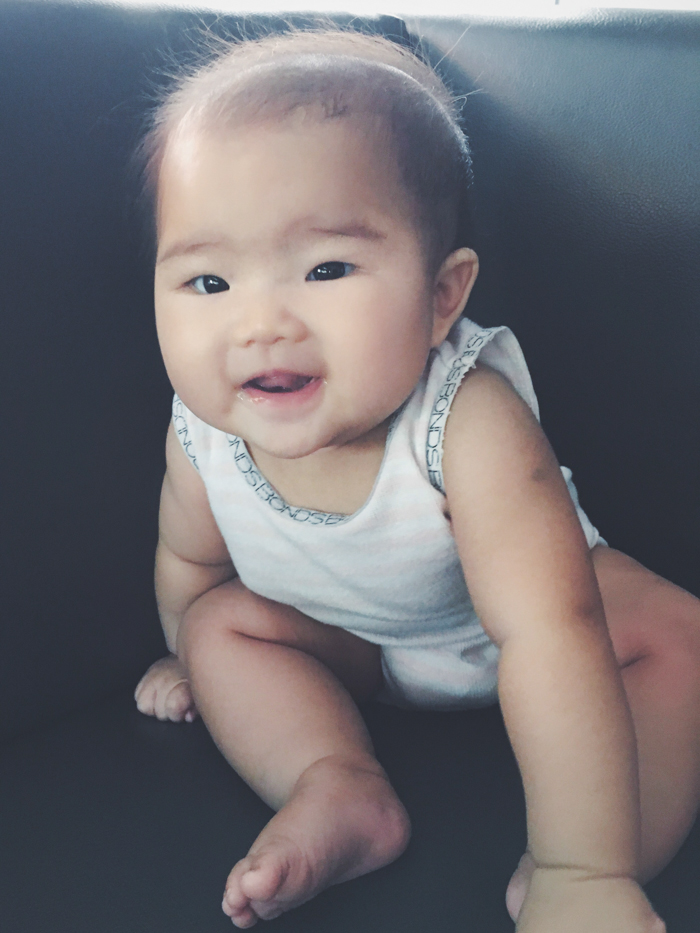
I’ve been trying to incorporate proper lessons into my homeschooling plans to supplement their playground/monkey face lessons, which although fun, don’t seem like the sort of thing that will get them into Harvard. By proper lessons, I mean the stuff that they’re required to learn in school like spelling and numbers and shapes. Pretty much stuff that they have absolutely no interest in.

Whenever it comes to these lessons, my kids have the attention span of a fish and 2 minutes into the lesson, they either ignore me or simply get up and walk off unceremoniously to go play with trains instead. So I’m constantly on the lookout for ways to make learning fun. Or as I like to call it, sneaking in a lesson so they think they’re playing but I’m actually teaching them something valuable.

I came across this brilliant idea from Jus and decided to try it on the kids. It’s a home-made sorting game where they can sort these cards according to shapes or colors. In one game, they learn shapes, colors and words. Bam, 3-lessons-in-1.

IMG 1639 Lesson 4: Sorting   a proper lesson for once

It’s very easy to make, even for someone as artistically challenged as I am. I printed out these shapes in different colors and cut them up into little cards for them to sort.

I actually wanted to laminate it but my laminating machine decided to eat up all my laminating pockets last night so I had to improvise by taping up the sides with magic tape. Tedious but it worked.

IMG 1581 Lesson 4: Sorting   a proper lesson for once

I was really surprised by how much the kids loved it. Well, Kirsten only wanted to sort the stars and she would scour the pile then go “TADA I GOT STAR!” I tried getting her to sort according to colors but she was all “no mommy, it’s wrong” and went for the stars instead. But at least she understood the concept of sorting, which was already a success.

IMG 1594 Lesson 4: Sorting   a proper lesson for once

Truett, as usual, was very focused on doing it right. He would peer at the stack of cards on the bed before carefully selecting each one as I shouted for random colors and shapes. He also stole my trademark finger-to-lip move whenever I’m pondering something intently like “hmm, let me see…”

PastedGraphic 13 Lesson 4: Sorting   a proper lesson for once

Seriously, any game that makes him think this hard has got to be good.

10 comments

I’m dedicating this post to anyone who at one point in their misguided youth ever (secretly) thought ah bengs and ah lians were cool. Or might have ever been one before (not judging!) I could never bring myself to be one but I’ll admit that there was a point in my life where I thought the outrageously tacky dressing was kind-of-almost-ok-more-than-a-little-bit awesome.

It seems like my kids may just revive the ah beng/lian look and give it a new grunge meets j-pop twist. Basically, a walking fashion disaster.

IMG 23331 Ah Beng goes to East Coast

IMG 23301 Ah Beng goes to East Coast

IMG 23262 Ah Beng goes to East Coast

And yes, I actually let my kids out of the house looking like this. Very terriberrrr parenting.

19 comments

Train-setting

by Daphne on April 11, 2011

in homeschooling

Truett has been eyeing a wooden train set for several months now. He first saw one at The Better Toy Store, a Thomas train table set that cost a whopping $600. Usually, we try to indulge them since they don’t ask for toys very often but for that price, the train set better be made out of gold and not wood. I checked it many times and I was pretty certain it was all wood (not even wood-plated gold) so we told him there was no way we’d fork out $600 for several pieces of wood.

He didn’t kick up a fuss, but instead kissed the train and waved a longing goodbye before saying, “next time daddy buy train set for me.” That was smooth, and secretly, it made us want to get him the set even more.

So when we made our trip to Florida, we were on a mission to return with a wooden train set for the kids for a lot less than $600. After scouring every toy store in the Orlando vicinity, we decided on 2 different train sets (1 from Imaginarium and 1 from Circo) for about $40 USD. Since the tracks were compatible, I figured I’d mix them up to create a giant set for them.

IMG 4598 Train setting

Joining up the sets was a lot harder than it seemed. I didn’t have any instructions to follow so I had to freestyle most of the time. Also, Tru had a lot of demands like the track had to run under the bridge and I had to use up every piece of track and it had to be rectangular not weirdly shaped. After many hours trying to come up with a design, I finally settled on version 5.3.

IMG 4670 Train setting

PastedGraphic 12 Train setting

IMG 4600 Train setting

The good thing is that it was a huge hit with the kids. It’s by far their favoritest toy and they’ve clocked more hours fiddling with this than any other toy they own. But the frustrating thing is that the playing inevitably degenerates into a Godzilla-destroying-city reenactment. Both kids will stomp on the pieces till they all come crashing down, then they will be all “OH NO TRAIN BROKEN…” and harass me till I rebuild it for them.

IMG 4663 Train setting

I’m thinking of mounting all the pieces on a table for them so I don’t have to keep rebuilding it again and again but I’m a little reluctant to glue all the pieces down permanently in case they want to change the design or add on more tracks in the future.

Any ideas on how I can do this?

33 comments

One of the perks of stay-home mothering is room for spontaneity, a quality often sacrificed in exchange for scheduled routines and regularity.

Yesterday though, was one of those days I decided to play the spontaneity card and be all “ok forget routine, let’s go do something fun just because we can.” Right after they got up from their naps, I told the kids we were going on a field trip to the airport. By bus. Just with mommy.

A year ago, I would have considered something like this to be a suicide mission and not to mention, a physical impossibility. I would have needed to carry 2 kids, a stroller and a diaper bag UP A BUS AND TRAIN. Now I’m not a public transport snob (even though I haven’t been on a bus for 2 years), but the thought of hauling 2 kids and half a mobile home up a bus seems ridiculous. I would have been the mother who dropped a kid while struggling to tap my EZ-link card with my teeth as the rest of the passengers gasped in horror.

Before we left the house, I gave them a pep talk to lay down some ground rules.

1. They were to carry their own bags so I could saunter freely along.

2. They were to hold my hands at all times.

3. No whining or tantrums or meltdowns.

Any violations would result in immediate termination and we would turn right back around, hop into a cab and head straight home (that was my back up plan for when something goes awry).

Long story short, it was a hugely successful field trip, one that will be remembered for all time as THE MOST AWESOME FIELD TRIP ALONE WITH MOMMY. They were on their best behavior the whole time, waiting patiently for the bus, sitting absolutely still on the train and following every instruction I gave (at one point, I made them do the Hot Potato dance just for my own entertainment). The journey to the airport took me an hour and a half and we enjoyed every moment of it.

So then that made me realize that I was guilty of being so destination-driven all the time. We talk about “enjoying the ride” like the overused catchphrase that it is without actually meaning it because the journey is so like meh, totally boring.

But for the kids, the journey was as much a highlight as the destination. Being on the bus and train was as enjoyable as being at the airport. So instead of stoning out and wishing the travelling wasn’t such a pain, I should just stop and enjoy the crap out of the journey.

Looking back at our recent Florida trip, some of the best moments we had was during the journey – waiting for the bus to arrive or being on the tram talking for hours. Sure, the destination was all kinds of fun but those long talks and bonding sessions, we had them on the go.

In short, remember to enjoy the journey, won’t you?

PS. I wanted to take some pictures but being alone on an adventure with both kids, I kind of had my hands full. You’ll just have to use your imagination.

7 comments

From time to time, I like to imagine the kids in different occupations. Occasionally, I take it a step further and dress them up for more realistic visualization. Most of them have flopped miserably and as a result have been struck off the list.

This one made it to the possible-but-potentially-problematic list, and only because baby girl totally rocks the race car driver look.

IMG 4166 When I grow up, Im going to be a race car driver

IMG 4181 When I grow up, Im going to be a race car driver

IMG 4182 When I grow up, Im going to be a race car driver

Truett got stuck with the job of the reluctant chauffeur coolie. He doesn’t rock that look so much; I’ll have to work on his list of approved occupations.

IMG 4208 When I grow up, Im going to be a race car driver

IMG 4212 When I grow up, Im going to be a race car driver

IMG 4215 When I grow up, Im going to be a race car driver

As a back up plan, we’re also adding playground safety officer to baby girl’s list. Not quite as prestigious as a race car driver but they always tell you to work on their strengths and she is really good at limbering up and making sure the playgrounds are safe for babies.

IMG 4223 When I grow up, Im going to be a race car driver

IMG 4227 When I grow up, Im going to be a race car driver

3 comments

Photography 101

by Daphne on April 5, 2011

in blogging about blogging

I never thought I’d be doing a post on photography because I’m hardly what you call an expert. Even enthusiast would be pushing it because I’m admittedly no shutterbug.

Back in NTU, I did do an obligatory course on photography (it was 202 for all the CS folks) where we all had to present our pictures to the class at the end of the course. Everyone had these artistic shots with brilliant lighting and composition while mine was truly appalling. It was like rows of bananas (I know, like what??) and as if to prevent my awful shots from mauling their eyes, I had to distract them by going on about capturing the mundaneness of everyday life; seeing the beauty in the ordinary blah blah blah. After the presentation, I turned to the husband (back then, just the boyfriend) and said “that was terrible wasn’t it?” and he paused for a moment then replied, “um, yeah babe, but hey, you’re really good at other stuff!”

Right then, I decided that this thing called “the eye for photography”, I didn’t have it.

But it’s probably a mothering thing, this need to capture the moments of your kids’ lives. Which is the main reason I decided to pick up a camera again. Recently, I’ve had a few emails from readers asking for photography tips and while I can’t give you guys professional photography lessons, there are several things I’ve learnt from other photographers that may be helpful to you. Most of these I’ve learnt from observing others (which is the best way to learn really) and handy tips others have shared.

1. Get a DSLR camera.

I know it’s pricey and bulky and complicated and a pain to learn andall that, but all good photographers will tell you that getting a DSLR is the best investment they’ve made. I’m not saying that a point and shoot can’t take good shots but there’s a limit to the things it can do, especially when it comes to shutter speed and aperture. In that one-second lag using a p&s, the moment would have passed and you’d end up with a blurry photo. When I use a p&s, I’m always going “WAIT HANG ON DON’T MOVE… GAH DO THAT AGAIN!” and there’d be another mass of blur. A DSLR can perform spectacularly in low light settings and capture those wonderful moments even when the kids refuse to sit still for a shot. I’ve given up asking them not to move so I take 10 shots in succession and usually, one will be good.

On the topic of price, you can easily start out with a secondhand Canon 400D that costs $380 and a Canon 50mm f1.8 that costs an additional $90 from Clubsnap. That’s about the price of a point and shoot. Instead of spending $3000 to get a brand new top of the line DSLR set, go easy and only when your needs/abilities outgrow your body and lens, upgrade them along the way.

2. Practice, practice, practice.

Honestly, the best way to learn is to keep taking shots. Experiment with different camera angles, focal lengths, apertures and compositions to see what works best. Try standing up, squatting down or even lying on the floor. Shoot from the front, the back, the side, the top and bottom. There’s really no hard and fast rule, so try to capture the feeling rather than worry about a set of rules.

3. Learn from the experts.

The other best way to improve your photography is to observe and learn from the best. My personal favorites are Ree Drummond, Kelle Hampton and Mckmama. Sometimes, I even select their best pictures and print out tearsheets when I go out for my shoots so that I can try and replicate the compositions and style. And no, that’s not technically cheating, just learning.

4. Try not to shoot on automatic mode.

Ideally, manual mode is the way to go because the pictures tend to look a bit flat if you’re on auto all the time. Manual works great for landscape shots but I still find it too tricky when I’m shooting moving objects, which I typically set to aperture priority (Av). Also, try to manually adjust the focal point instead of leaving it on auto so you can select the spot you want to focus on. Most of the time, I set it on the kids’ eyes so that it’s tack sharp unless I’m trying to highlight what they’re doing or what’s in their hands, then I adjust accordingly.

5. Styling.

This, I learnt looking at Kelle Hampton’s pictures. Her girls are always dressed up so beautifully and decked out in all kinds of pretty accessories. There’s a lot of behind-the-scenes effort to make the pictures really pop. Especially with girls, you can go all out with the hair clips, sunglasses, hats, pins and necklaces, remembering that it’s ok to be a little flamboyant because that makes a photo stand out a lot more than messy hair and boring old discolored rompers that have been worn by their previous 5 siblings.

After a while, you’ll be able to tell which angles work best for your kids. Unless both sides of their face are symmetrical (hellooo Jude Law), there’s usually a side that shows up better in pictures. Find that side and work it. After all, a good photo brings out the best qualities of a person.
IMG 4076 Photography 101

Usually, baby girl hates having stuff jabbed into her hair but this one lasted a while before she yanked it off.

6. Lightroom.

Purists will say that editing a photo is cheating but until the day my skills are badass enough for me to look at a shot straight out of camera and go “man, that is one hell of a good shot!”, I’ll have to touch up the pictures. For me, Adobe Lightroom serves that purpose very well. A lot use Photoshop but I find that Lightroom is easy enough to learn and powerful enough to do a great job. Again, there’s a lot of trial and error here. I usually look at an example of a good photo and try to replicate it by adjusting the lighting, contrast, vibrance, cropping, etc. There are also tons of Lightroom presets you can use to make your job easier.

PastedGraphic 11 Photography 101

This is a before/after comparison of an earlier shoot. Out of camera, it was ok at best. It was underexposed, the shot composition was weirdish, and the colors were too dull but with a bit of Lightroom tweaking, it popped.

These are just some of the basics to get you started but the important thing is to practice and enjoy it. Give it a shot!

33 comments

Our weekends are finally returning to some form of normalcy and by that I mean that we’ve resumed our regular Sunday brunches, this time at the Botanic Gardens. It’s a nice routine, being out for some fresh air and wide open spaces with the kids. We’ve missed this.

IMG 4245 Back to the Botanics and a visit to Jacob Ballas

IMG 4249 Back to the Botanics and a visit to Jacob Ballas

PastedGraphic 1 Back to the Botanics and a visit to Jacob Ballas

On the menu that morning was also a third attempt to check out the Jacob Ballas Children’s Garden. The past two times, locating it proved to be an elusive affair. Apparently it’s within walking distance from the Visitor’s Centre but since my definition of walking distance is decidedly shorter than most people when we have 2 kids in tow, we went for the driving option instead. But the carpark is tucked away inside another carpark and we all got a little impatient and gave up after circling round the Bukit Timah area. Twice.

This time, with a little bit of determination and a map, we finally found it (Use the NUS carpark entrance if you’re looking for it – it’s not listed at the entrance but that’s the right one). In addition to a flower trail and pond, there was also a water play and sand play area with a playground. Ok, as far as playgrounds go, this one wasn’t as impressive as the one at Pasir Ris Park but still, nice enough.

IMG 43361 Back to the Botanics and a visit to Jacob Ballas

IMG 4321 Back to the Botanics and a visit to Jacob Ballas

IMG 4348 Back to the Botanics and a visit to Jacob Ballas

PastedGraphic 2 Back to the Botanics and a visit to Jacob Ballas

Till this day, I still get all icky about sand but I’m glad baby girl has outgrown that phase. She was happily shoving sand into her shorts and diapers while I watched in horror because momma’s going to be the one cleaning sand bits from between the folds of her thighs.

IMG 4358 Back to the Botanics and a visit to Jacob Ballas

IMG 4416 Back to the Botanics and a visit to Jacob Ballas

IMG 4376 Back to the Botanics and a visit to Jacob Ballas

They rounded it up with some water play (don’t do the water before the sand – all you will get is muah chee) to cool down a little. All the other kids came decked in their swim gear but we had no idea there even was a water play area so we took off Tru’s top and Kirsten’s shorts before setting them loose.

The next time we go, we’ll definitely prep their swim stuff and a bunch of water toys.

IMG 4501 Back to the Botanics and a visit to Jacob Ballas

IMG 4554 Back to the Botanics and a visit to Jacob Ballas

1 comment

Page 30 of 94« First...1020...2829303132...405060...Last »